AECP Level 2: Final Challenge Part 2
By Meetu Aggarwal
Hello, Thank you for visiting my blog. Here is my project for the Altenew AECP Level 2 Final Challenge Part 2 – Recycled Fridge Magnet – Calendar and Notepad. Here...
Read moreDiscover Crafting Essentials at Krafters Cart
By Meetu Aggarwal
Hello, Thank you for visiting my blog. Here is my project for the Altenew AECP Level 2 Final Challenge Part 2 – Recycled Fridge Magnet – Calendar and Notepad. Here...
Read more
By Meetu Aggarwal
Hello, Thank you for visiting my blog after a long time. It’s been nearly 1 ½ years, since my last post for the AECP. Just a recap, I had finished...
Read more
By Meetu Aggarwal
Hello, This is my 10th card for level 2 of AECP. This card is based on Magical Marker Techniques class conducted by Sara Naumann. For my card today, I have...
Read more
By Meetu Aggarwal
Hello, This is my 9th card for level 2 of AECP. This card is based on Creative Watercolour Media conducted by Jennifer Rzasa, Debby Hughes, and Laura Bassen. For my...
Read more
By Meetu Aggarwal
Hello, This is my 8th card for level 2 of AECP. This card is based on Impressive Heat Embossing conducted by Svetlana Marchenko. I tried Ombre heat embossing for the...
Read more
By Meetu Aggarwal
This is my 7th card for the level 2 of AECP. This card is based on With a Twist class conducted by Therese Calvird. I have combined two techniques taught...
Read more
By Meetu Aggarwal
Hello, This is my sixth card for the level 2 of AECP. This card is based on Polychromatic class conducted by Nina-Marie Trapani. I have followed the technique taught by...
Read more
By Meetu Aggarwal
Hello, This is my fourth card for the level 2 of AECP. This card is based on the Masking Unleashed class conducted by Svitlana Shayevich. If you are new to...
Read more
By Meetu Aggarwal
Hello, This is my third card for the level 2 of AECP. This card is based on the Colour Your Day class conducted by Therese Calvird. For this card, I...
Read more
By Meetu Aggarwal
Hello, Here is my second submission for Altenew Educator Certification Program Level 2. This card is based on lesson six of the class In the mood for Colour. The class...
Read more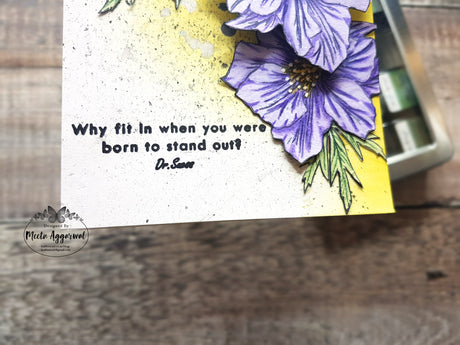
By Meetu Aggarwal
Hello, Here is my first submission for Altenew Educator Certification Program Level 2. This card is based on techniques learnt in the class Beautiful Details. The class was conducted by...
Read more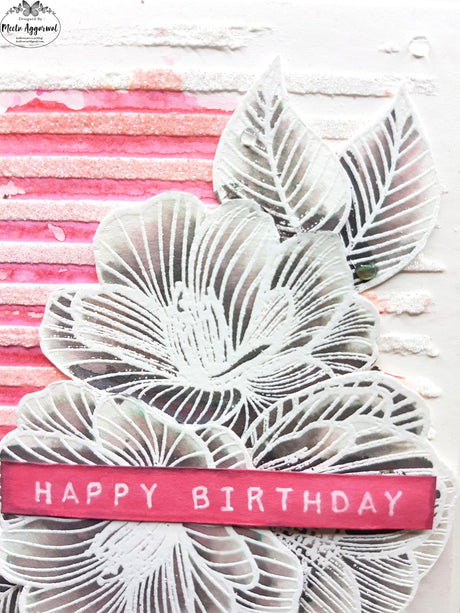
By Meetu Aggarwal
Hello, Welcome to my Blog! The card I am sharing today incorporates three techniques Emboss resist, creating texture with Embossing Paste/stencil and Painting with Inkpads. This is Part 2 of...
Read more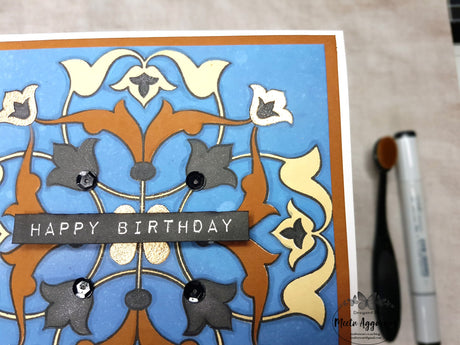
By Meetu Aggarwal
Today, I am going to share a masculine birthday card. This is a part of the final challenge given to me for completing Level 1 of the Altenew Educator Certification...
Read more